Displaying items by tag: trail cameras
Up close and personal with our little bush friends
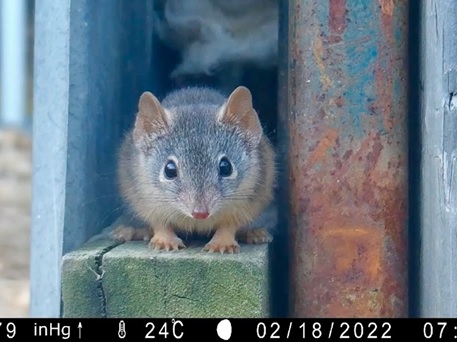
Trail cameras are a wonderful way to discover who you are sharing your block of land with – be it feral pests or some of Australia’s unique bird and animal species. However, they’re designed to look at large creatures and give disappointing results on small birds and animals. Moving the camera too close to the target (be it food, or a hole in a fence, or a water bowl) only results in a fuzzy picture as the cameras have a fixed focus that is set for objects a few metres away.
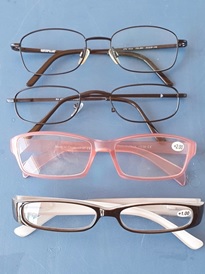
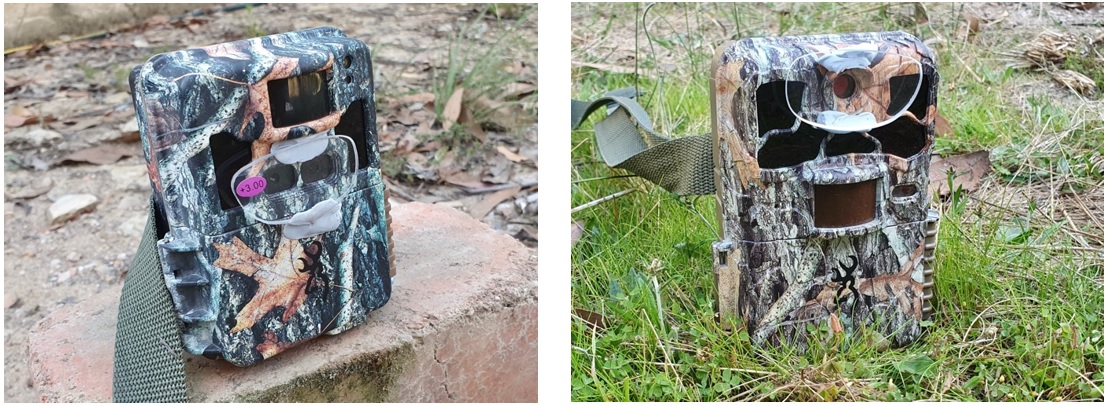
Fortunately, reading glasses work the same way on cameras as they do on people. So, taking one lens from a cheap (less than $10) pair of glasses and attaching it over the camera lens with Blu-Tack is all that’s needed to bring the focus in closer.
Reading glasses come in a range of “strengths”, denoted by the dipotre (D). This is usually printed on the frames or on a small removable sticker. Attached in front of a camera that was originally designed to focus on distant objects, the lens from the reading glasses will place the focal point of the camera at a distance from the camera (in metres) equal to 1/D. So, for commonly available glasses,
D New focus position
+1 1 metre
+2 0.5 metre
+3 33cm
+4 25cm
A few tips
* The cheapest glasses with plastic frames have the lenses glued in place. They are difficult to remove without some violence. For a few dollars more, metal-framed glasses come with lenses that will pop out under strong pressure from a thumb.
* It does not matter if the lens partially covers the infrared illumination LEDs of the camera.
* However, if the lens is too large it might prevent the camera door from opening. The plastic lens can be cut down to size with a small saw such as a Dremel.
* The “depth of field”, or range of distances over which focus is maintained, becomes smaller as the power of the lens increases. A +3 dipotre lens will create a depth of field of only a few cm, requiring careful placement of the camera relative to the subject.
All photos by the author. The small animal pictured above is a yellow-footed antechinus, or mardo (Antechinus flavipes), taken through a +3 lens attached to a Browning trail camera.
John Storey,
Gunning District Landcare
21 Feb 2022
Trail Camera Photo Competition

Gunning District Landcare is holding an exciting new competition. Anyone can enter, and entry is free!
Take a photo using an automatic trail camera (we’ll lend you one if you don’t have your own), explain in 100 words or less the significance of the photo, and submit it to us by 5pm on Friday 15th October 2021.
A panel of judges will select the best photos for display at the Gunning Arts Festival at the end of October, and the winners will receive cash prizes of $100 each. There’s even a “lucky door” prize – a high quality trail camera!
Please see the competition page here, or download the PDF here.
For more information, including how to borrow a Gunning District Camera trail camera, contact This email address is being protected from spambots. You need JavaScript enabled to view it.
Baits and Trail Camera Workshop
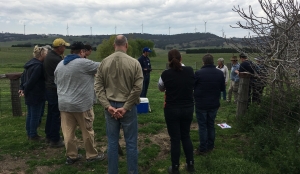
Gunning District Landcare has been a central player in establishing the region's coordinated fox baiting program. While the program is largely successful, there are always improvements that can be made, such as ensuring best practice baiting techniques are followed, and improving monitoring of pest animals and the impact of the baiting program. Thanks to funds from the Managing Established Pest Animal And Weeds program (MEPAAW - a partnership between NSW DPI and Landcare NSW), we were able to offer a workshop on 'Laying Baits & Using Trail Cameras'. The aims of the workshop were: 1) provide some practical demonstration of the best methods for laying baits and choosing the best baiting sites, and 2) demonstrate how to effectively use trail cameras to monitor and manage pest animals. Bobby Dillon, a bio-security officer from the Goulburn Local Land Services office, conducted the workshop which was held on a farm close to Gunning. The workshop started with an informative powerpoint presentation in the shearing shed, before we moved outside to watch a demonstration of tethering baits, setting Canid Pest Ejectors, and discussing the best locations for laying baits (TIP: "think like a fox"!). The workshop finished inside where participants were entranced by trail camera photos of pests and wildlife. We then enjoyed some long chats over a lovely catered lunch. The workshop was informative and enjoyable, and all participants were clearly engaged. New baiters left feeling more confident about how to get started, and experienced baiters picked up some good tips and tricks to make their practices more effective. There was some unexpected advice, such as the garnishing baits with blackberry jam, and splashing fish sauce or tuna oil around the baiting location. It seemed that everyone was inspired to try using trail cameras to get a better understanding of the pests and wildlife on their properies.
![]()